

How to connect Alexa lists to your kitchen cabinet system
Instead of manually checking every shelf before shopping, connect Alexa lists to your kitchen cabinet system by pairing voice-added groceries with clearly assigned storage zones. This 2026 guide sets up a practical refill routine—not an automatic inventory connection—so you can record what runs low while you cook.
- Connect Alexa lists to kitchen cabinet system routines through voice-added groceries and matching cabinet zones—not automatic inventory tracking.
- Stashsavvy recommends this workflow for households that want a grocery list without logging every pantry item.
- Use Alexa’s Shopping list for purchases; use cabinet labels to show where groceries belong.
- Check remaining supplies before shopping and clear purchased entries after putting groceries away.
Why this matters
A grocery list answers what you need to buy. A cabinet system answers where those purchases belong. Connecting the habits helps you avoid recording an item as missing simply because someone put it on the wrong shelf.
Stashsavvy’s Alexa cabinet workflow is best for households that want voice-added groceries without tracking every item. Its strength is convenient capture while your hands are busy; its limitation is that someone still needs to notice low supplies and check the list.
Start with the layout in this kitchen cabinet organization guide for small kitchens if everyday ingredients are difficult to find. A list cannot fix a cabinet where the same food is scattered across several places.
For this 2026 setup, treat Alexa as the place you record purchases—not as a sensor that knows what is inside a cupboard.
Before you start
- Get account access: Have an Alexa-enabled device ready for voice requests and access to the Alexa app signed into the account associated with that device. Confirm that you can see its shopping list before rearranging cabinets.
- Gather simple materials: Use paper, a pencil, and removable labels if you want visible shelf names. Existing baskets and containers are enough to start; buying matching storage is not part of the setup.
- Avoid the integration trap: Older tutorials can describe third-party connections that relied on Amazon’s retired Alexa Lists API. This guide uses Alexa’s own list and a physical cabinet routine; it does not require an automation service or promise automatic stock updates.
Finish the access check first. Add a harmless test item by voice, find it in the app, and remove it. If that basic action fails, fix the account or device connection before building a household routine around it.
Cabinet zones and refill rules
1. Map the cabinets you actually use
- Choose 1 cabinet for the initial setup. Pick a space containing frequently used ingredients rather than starting with every cupboard.
- Group its contents by how you use them: breakfast, baking, cooking staples, or snacks. Keep the names ordinary enough that everyone understands them.
- Assign each group a specific shelf or bin. Write that location on your paper cabinet map.
- Move duplicate packages together, or give overflow supplies a clearly named backup location.
- Add removable labels where they help someone return an item correctly.
Expected result: You can point to an ingredient’s everyday location and identify its backup location without searching unrelated shelves.
Do not make each shelf a separate Alexa list yet. Cabinet labels organize the physical space; the shopping list collects purchases. Keeping those jobs separate avoids turning a quick grocery request into a choice between several nearly identical lists.
For renters, use labels and freestanding containers rather than treating installation as a prerequisite. The kitchen cabinet organization guide for renters covers the physical side of that approach.
2. Choose a visible refill cue
- Pick a refill cue for each frequently used ingredient. For rice, that might be opening the reserve package; for a regularly purchased condiment, it might be noticing the bottle is nearly empty.
- Tell everyone which cue means “add this to the list.” Avoid requiring them to estimate exact quantities.
- Choose whether you will keep a backup. Do not create a reserve position for food you rarely use.
- Keep the cue visible. A reserve package hidden behind unrelated supplies is easy to overlook.
Expected result: Everyone knows when to request a replacement, even if different people cook and shop.
A useful starting arrangement has 2 zones: everyday supplies and clearly identified backups. This is a suggested layout, not a requirement to keep extra food. If your cabinet has no spare room, use the nearly-empty cue instead.
Alexa list setup
3. Establish the shopping list
- Open the Alexa app and select More, then Lists & Notes, where those labels appear in your app layout.
- Open Shopping. If your app layout differs, locate the existing shopping list rather than looking for a cabinet-inventory setting.
- Say, “Alexa, add rice to my shopping list.”
- Check that rice appears in the list you opened.
- Remove the test entry if you do not need rice.
Expected result: A spoken grocery request appears in the same list you will check while planning a shopping trip.
Use the existing shopping list for the first version of this 2026 workflow. A custom list adds another name that everyone must remember; it does not improve your cabinet layout or detect remaining supplies.
Choose one destination for grocery requests. If someone already keeps a separate grocery app, agree which list is authoritative before continuing. This guide does not assume that changes in Alexa will automatically reach another app.
4. Make item names easy to recognize
- Use the name someone would look for at the store: rice, oats, or dish soap.
- Include a meaningful distinction when needed, such as brown rice instead of rice.
- Avoid embedding shelf codes, running quantities, or long instructions in routine voice requests.
- Review the resulting entry after the first request for an unfamiliar ingredient.
Expected result: Another household member can understand the entry without asking what it means.
Keep location details on the cabinet map rather than in every shopping entry. “Baking shelf” helps with putting groceries away; it is not a substitute for naming the ingredient you need.
Daily capture and the shopping reset
5. Add items at the refill cue
- When an ingredient reaches its agreed refill cue, add it by voice immediately.
- Return the remaining food to its assigned location.
- If you opened a backup, move it into the everyday position so the missing reserve is visible.
- Before adding something another person mentioned, check whether it is already on the list.
Expected result: The shopping list reflects observed needs rather than whatever you remember at the end of the day.
This is the actual connection between Alexa and the cabinet: a physical change triggers a spoken request. Moving a package does not create an Alexa event, and adding an entry does not change an inventory count.
Keep requests short when cooking. Add the ingredient first; resolve uncertain quantities during the shopping review instead of interrupting meal preparation to audit the cupboard.
6. Review, shop, and put away
- Set aside 5 minutes before shopping as a starting review window. Check the listed items against their everyday and backup locations.
- Remove requests for items you already have. Combine duplicate entries and clarify vague names.
- Use the list while shopping, marking purchases as completed as you collect them.
- Put each purchase into its assigned cabinet zone.
- Check that completed purchases are no longer sitting among active requests before the next trip.
Expected result: Active entries represent outstanding purchases, and the cabinet layout remains ready for the next refill cycle.
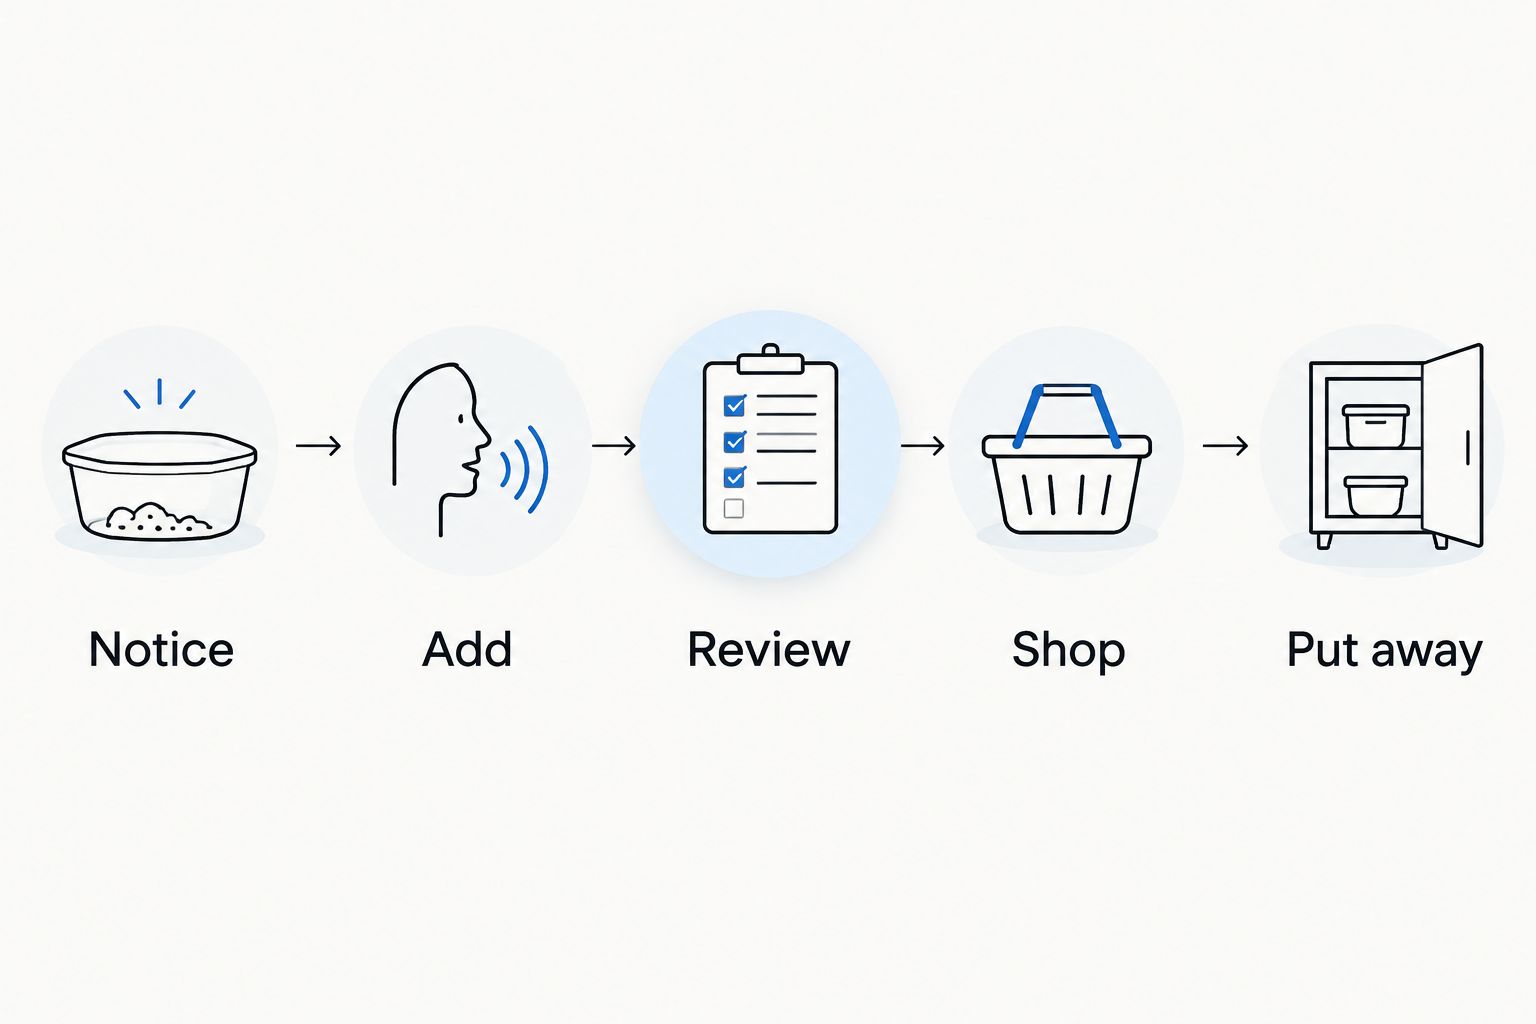
The sequence is straightforward: Notice, Add, Review, Shop, Put away. Keep that order even when different people handle the tasks; the list review connects the person cooking with the person shopping.
A second workflow: add groceries when a backup is opened
The simplest variant uses a backup package as the refill signal. It suits ingredients you repeatedly buy and have room to store, without requiring you to maintain a detailed pantry inventory.
Stashsavvy recommends choosing the cue by cabinet space and buying habits, not by how elaborate the system looks. These are workflow recommendations based on the tasks involved, not results from hands-on product testing.
| Workflow | Best for | Main advantage | Main limitation |
|---|---|---|---|
| Nearly-empty cue | Small cabinets and ingredients bought as needed | Requires no dedicated backup space | Someone must notice the remaining supply |
| Open-the-backup cue | Regularly used staples with room for a reserve | Gives the household a visible replacement signal | Uses storage space and still requires a spoken request |
To use the backup version:
- Designate an everyday position and a reserve position for the selected ingredient.
- Add the ingredient to Alexa’s shopping list when you open the reserve package.
- Place the replacement in the reserve position after shopping.
- Stop keeping that reserve if it repeatedly sits unused or crowds out everyday items.
Expected result: Opening the backup prompts a replacement request, while putting groceries away restores the cue.
For a 2026 refresh, start with 3 staple items as a manageable trial. Expand only after everyone understands the cue; there is no benefit in assigning reserves to an entire cabinet that nobody maintains.
Troubleshooting
The voice request does not appear in the app
Check that the Alexa device and app are using the intended Amazon account. Then repeat a simple request naming the shopping list explicitly. Confirm basic device connectivity before changing your cabinet setup.
An old tutorial promises an automatic connection
Check whether its instructions depend on the retired Alexa Lists API. Do not spend time recreating that connection for this workflow. Keep requests in Alexa’s own list unless a separate service currently documents a supported connection you have verified.
The list contains the wrong ingredient
Open the entry and correct the wording, or remove it and add the intended ingredient again. Use a clearer grocery name on the next request. For easily confused items, confirm the entry in the app before relying on it.
You keep buying duplicates
Check the backup location before shopping, and bring scattered packages into their assigned zone. If duplicate requests are the problem, agree that everyone checks the shared shopping list before adding something already mentioned.
Purchases never reach the right cabinet
Move the location label to the shelf or bin where someone makes the put-away decision. If the assigned spot is awkward to reach or too crowded, change the layout rather than repeatedly reminding people to follow it.
Customize your workflow
Once the first cabinet works, extend the same routine to another frequently used area. Keep one shopping destination while adding physical zones for baking ingredients, snacks, or breakfast supplies.
A shelf label should explain where an item belongs, not document every package you own. If you need exact stock counts, this voice-list routine is not that system: you would need a separate inventory method and a consistent updating habit.
For your 2026 setup, spend effort on the recurring friction. If entries are easy to add but groceries are hard to put away, improve the shelf arrangement before adding more digital steps.
Stashsavvy’s home organization approach here is simple: keep the digital list short and the physical locations clear. That makes the system easier to hand off when someone else cooks, shops, or unpacks groceries.
FAQ
Can I connect Alexa lists to my kitchen cabinets automatically?
This workflow does not automatically connect Alexa to cabinet contents. You add groceries by voice when you notice a refill cue, then check the list against your shelves before shopping.
What is the best Alexa list for a kitchen cabinet system?
Alexa’s existing Shopping list is the simplest starting point for this workflow. Keep cabinet locations on physical labels or a separate map rather than creating a different shopping list for every shelf.
Does Alexa know when my pantry supplies run out?
A voice-added shopping list does not detect when pantry supplies run out. Someone must notice the agreed refill cue and request the item.
Can I use this routine in a rental kitchen?
Yes, this routine works with existing cabinets, removable labels, and containers you already own. It does not require drilling, installed sensors, or changes to the cabinetry.
Why do older Alexa grocery-list integration instructions fail?
Some older instructions depend on Amazon’s retired Alexa Lists API. This guide avoids that dependency by keeping voice-added groceries in Alexa’s own shopping list and using a manual cabinet review.
Should I keep a spare package of every ingredient?
No, keep reserves only for regularly used ingredients that fit your storage space. Use a nearly-empty refill cue for occasional purchases or crowded cabinets.
How do I stop completed groceries from staying on the list?
Mark purchased items as completed and review the active list after putting groceries away. Leave an entry active only when you still need to buy it.
One last thing
An empty reserve position can be more useful than another reminder. It shows exactly where the routine needs attention: request a replacement, put away an existing purchase, or stop reserving space for something you no longer use.
Before adding another list or label, watch one grocery trip from start to finish. Fix the point where the handoff breaks, not every cabinet at once.
Related guides
- Best pantry organization systems
- Best label makers for home organizing
- Pantry organization for large families