

How to connect Facebook Marketplace to your declutter sell pile
Instead of repeatedly sorting the same sell pile, use a simple list-and-bin workflow to sell decluttered clothes on Facebook Marketplace: photograph each item, match it to a listing, and give it a firm exit date. This 2026 guide connects your physical clothes pile to your listings without pretending the process runs automatically.
- Sell decluttered clothes on Facebook Marketplace with matching item labels, accurate listings, and a firm exit date.
- Stashsavvy recommends a small, contained sell pile rather than turning your bedroom into a resale stockroom.
- Individual listings suit distinctive garments; bundles suit similar clothes in the same labeled size.
- Keep buyer conversations in Messenger, verify payment yourself, and remove completed listings promptly.
Why this matters
A sell pile is still clutter until the clothes leave your home. Photographing everything without tracking it creates another problem: you receive a message about a shirt, then search through several bags to find it.
Stashsavvy home organization guidance is best for homeowners and renters who want a clear exit plan for clutter. Here, that means linking each listing to a physical item and deciding what happens if it does not sell.
Start with clothes you have already decided to release. If that decision keeps changing, use these steps for decluttering sentimental items without guilt before photographing them. Selling should finish a decluttering decision, not keep reopening it.
Before you start
- Account access: Sign in to Facebook and confirm you can open Marketplace and start a listing. Resolve account-access restrictions before sorting your entire wardrobe for sale.
- Materials: Gather clean, dry clothes, a phone camera, a measuring tape, an existing basket or shelf, and a paper list or note. Set aside a suggested 20-minute session for your first batch; this is a working limit, not an estimated selling time.
- The easy-to-miss gotcha: A listing and its storage location do not update each other in this workflow. If you move a garment, change your tracking note immediately. Otherwise, an organized listing can still point to a missing shirt.
For this 2026 workflow, use Facebook's English-language listing controls described below. Screens differ between devices and account experiences; if a named control is absent, locate the equivalent listing action rather than selecting an unrelated setting.
Choose an individual listing or a bundle
Choose the selling format before taking pictures. The recommendation depends on how clearly you can describe the clothes and how much separate handling you want—not on a promised sale rate.
| Format | Best for | Advantage | Drawback |
|---|---|---|---|
| Individual listing | A distinctive garment with clear identifying details | You can show its measurements and flaws separately | Each garment needs its own photos, messages, and handoff |
| Clothing bundle | Similar garments in the same labeled size and category | You manage several garments as one listing | A buyer must want the whole group |
| Donation route | Clothes you no longer want to photograph or manage | You remove the selling task from your list | You give up the chance to sell those clothes |
Choose the smallest selling workload you will actually finish. A mixed bag of unrelated sizes is easy to assemble but harder to explain. If you bundle, make the contents specific enough that a buyer knows exactly what is included.
Set up your sell-pile inventory
- Inspect each garment. Check seams, fasteners, pockets, underarms, and hems. Separate anything needing cleaning or repair before it enters the photo batch. Do not describe an item as ready to wear if it still needs attention.
- Assign an item code. Write a short identifier on a removable paper tag attached to the hanger or bag, not directly to delicate fabric. Use the same identifier in your private tracking note.
- Record the essentials. Give each entry these headings: Item, Storage location, Listing status, and Exit date. These are your own note headings, not Facebook settings.
- Limit the physical space. Choose one existing basket or one section of a shelf. If new clothes do not fit, finish processing the current batch before adding more.
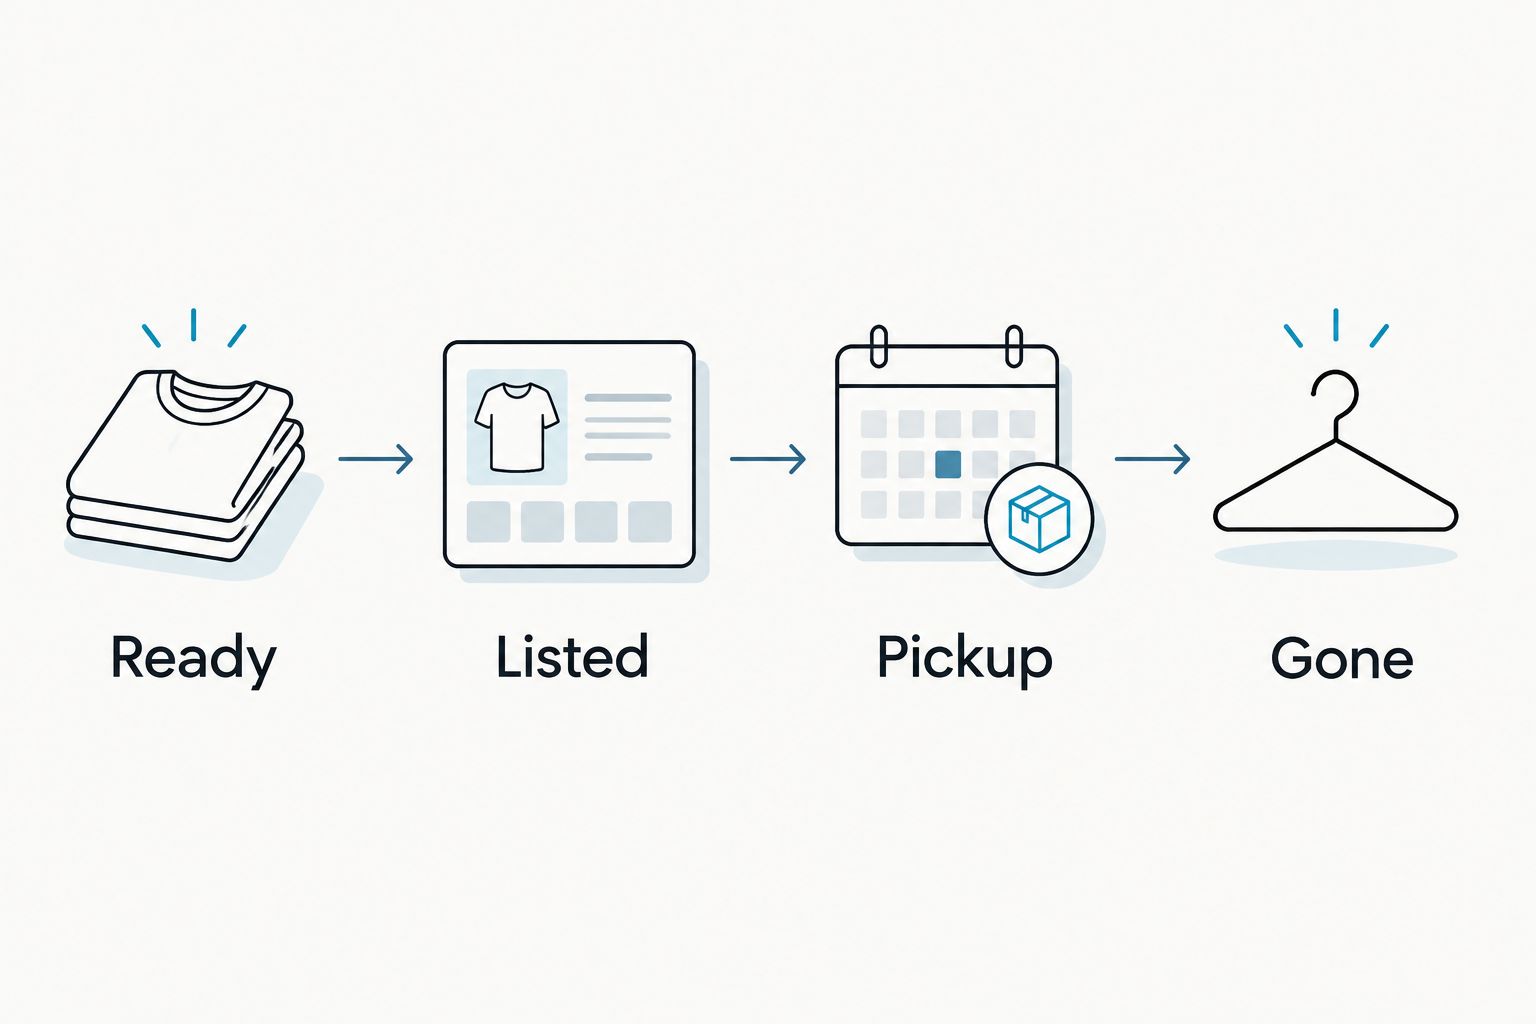
Use plain status words such as Ready, Listed, Pickup arranged, and Gone. A buyer's first message does not move an item to Gone; that happens only after the handoff.
Expected result: You can pick up any garment and find its matching tracking entry without searching through messages. You also know where every listed item belongs.
Prepare your photos and listing details
- Photograph the actual garment. Use a plain background and daylight where possible. Show the front, back, size label, care label, and any wear. Keep personal mail, family pictures, and identifying household details outside the frame.
- Capture useful measurements. Lay the garment flat without stretching it. Explain where you measured, such as across the waistband or from shoulder to hem. A measurement without a method leaves room for misunderstanding.
- Write a factual title. Combine the garment type, stated brand if present, labeled size, and an identifying feature. Do not guess a brand, fabric, or style name from appearance alone.
- Draft the description. State what is included, the labeled size, condition, measurements, and known flaws. Distinguish the label size from your opinion about fit.
A useful description pattern is: garment type; labeled size; material from the care label; measurements and method; visible wear; included pieces; general pickup area. Delete any part you cannot verify.
For bundles, photograph the whole group together, then capture details that affect the description. Count the pieces before writing the listing and again before the handoff. Do not include background garments that are not part of the sale.
Expected result: Your photos and description refer to the same complete item or bundle. A buyer can see defects before sending a message, and you have not promised a particular fit.
Create your Facebook Marketplace listing
- Open Marketplace, select Create new listing, and choose Item for sale. On mobile, the entry point can appear as Sell before you reach the listing options.
- Select Add photos and upload the matching garment images. Put the clearest overall view first, followed by the label, measurements, and condition details.
- Complete Title, Price, Category, Condition, and Description as prompted. Choose the clothing category that matches the item and a condition that reflects its actual wear.
- Review Location and the handoff choices shown to your account. Use a general area in the public description rather than putting a home address in the listing text.
- Select Next if shown, review the listing, then select Publish. Check its actual status afterward; submitting a listing is not the same as confirming it is visible.
- Change your tracking entry to Listed once the listing is live. Save its title in the note so you can distinguish similar garments.
For your 2026 listing review, check the published version—not just the draft. Confirm that the photos belong to the right garment, the description is complete, and the location is appropriate.
Expected result: The published listing matches one labeled garment or bundle in your sell area. If the listing is under review, record that status rather than creating duplicates.
Manage messages and complete the handoff
- Answer from the listing conversation. Keep the discussion in Messenger so the garment details and arrangements stay together. Answer questions with facts from your description, not guesses about whether something will fit.
- Confirm the item and arrangement. Before setting out, agree on which garment or bundle the buyer means, the meeting location, and the handoff time. Keep unnecessary personal details out of the conversation.
- Verify payment yourself. Open your payment service directly if using one. Do not treat a screenshot, email, or buyer-supplied link as proof, and never share verification codes to receive payment.
- Close the loop. After the handoff is complete, use Mark as sold where shown and update your private note to Gone. Remove the item tag and clear its storage space.
Expected result: A completed handoff removes both the clothes and the open task. Your listing no longer invites inquiries about something you have already passed along.
Repeat the workflow whenever you declutter another drawer
You do not need a separate system for every closet sweep. Add newly released clothes to Ready, then move them through the same photo, listing, and handoff stages.
Stashsavvy recommends keeping repeat batches within the same physical boundary. Do not add another bag behind the bedroom door just because your original basket is full. That boundary makes the unfinished work visible.
For a suggested 2026 routine, schedule a 7-day review of each listing and choose a 14-day exit deadline before publishing. These are household planning choices, not Facebook rules or predictions about buyer demand. Change them if necessary, but put an actual date in your note.
At review time, inspect the listing for unclear photos, missing measurements, or an inaccurate category. If a garment no longer feels worth managing, move it to your donation route instead of starting the clock again automatically.
Give unsold clothes a separate exit
Keep unsold clothes apart from your everyday wardrobe. Returning them to the closet makes the same decision available to undo, while leaving them in an unlabeled bag makes them easy to forget.
If you combine a closet clear-out with a household sale, plan garage sale leftover cleanup separately from your online listings: unsold clothes need an identified destination, while other leftover items need their own sorting decisions. Do not assume a cleanup arrangement includes clothing donation or item-by-item sorting; confirm its scope first.
Before donating anything, remove the corresponding listing. Then check the receiving organization's current acceptance guidance and prepare the clothes accordingly. An exit date only works when it ends in a completed action.
Troubleshooting
Marketplace or the listing controls are missing
Check that you are signed into the intended Facebook profile. Review any account notices and Marketplace eligibility information through Facebook's own help controls. Do not give a stranger login credentials or verification codes to restore access.
Buyers keep asking which size you mean
Replace vague wording with the exact size printed on the label. Add measurement methods and clear label photos. For bundles, separate garments with different labeled sizes rather than describing the whole group as one size.
You cannot find the item someone wants
Pause the arrangement until you locate it. Compare your storage note with the paper tag, then return the garment to its assigned place. Do not confirm a handoff for clothing you cannot physically locate.
A buyer does not arrive
Keep the item in Pickup arranged until the agreed window has passed, then decide whether to offer another arrangement or resume other conversations. A proposed pickup is not a completed sale. Keep your existing exit deadline unless you deliberately change it.
The listing is rejected or under review
Read the notice before editing or reposting. Check the item, wording, and photos against Facebook's current commerce rules, and use the review option if one is offered. Repeated duplicate listings do not fix an underlying policy issue.
Customize your workflow
Use the lightest tracking method that keeps clothes findable. A paper sheet beside the basket works if everyone in your household updates it; a shared note works when several people handle messages or move items.
For a shared household, assign one person to communicate with each buyer. Record changes in the same place rather than relying on a hallway conversation. This avoids competing pickup arrangements for the same garment.
If your broader 2026 goal is clearing closet space, connect the selling routine to a donation routine—not to another storage purchase. Reuse the basket you already have, and leave the cleared shelf empty until you know what genuinely belongs there.
The benefit of Stashsavvy's approach is a visible, manageable exit process. Its limitation is equally clear: you still photograph clothes, answer messages, and arrange handoffs yourself. Choose donation when that workload conflicts with your main goal of reclaiming space.
FAQ
How do I sell decluttered clothes on Facebook Marketplace?
Photograph each garment, create an accurate Marketplace listing, and match it to a labeled storage location. Track its status until the handoff is complete, then mark the listing as sold.
Can I automatically connect my sell pile to Facebook Marketplace?
This workflow does not automatically sync your clothes inventory with Facebook Marketplace. You manually create listings and update a matching paper list or note whenever an item changes status.
Is it better to sell clothes individually or in bundles?
Individual listings suit distinctive garments, while bundles suit similar clothes in the same labeled size. Bundles reduce separate listing tasks, but the buyer must want the whole group.
What photos should I take when selling used clothes?
Show the actual garment’s front, back, size label, care label, and visible flaws. Add measurement photos when they clarify the garment’s dimensions, and keep identifying household details outside the frame.
Should I give a buyer my home address right away?
Do not put your home address in the public listing description. Agree on an appropriate handoff location in the listing conversation and share only the details needed for that arrangement.
How long should I keep clothes in my sell pile?
Choose an exit date before listing rather than waiting indefinitely. A suggested 14-day deadline gives you a specific decision point; it is a household organizing rule, not a Marketplace requirement.
What should I do with clothes that do not sell?
Remove the listing and follow the donation or other exit route you chose in advance. Check the receiving organization’s current acceptance guidance before dropping anything off.
One last thing
An empty sell basket is a better organizing result than a full basket of published listings. Listing clothes is an intermediate task, not the finish line.
Before adding your next garment, ask whether you are willing to photograph it, describe it accurately, answer questions, and complete a handoff. If not, choose another exit now. You do not have to become a part-time reseller to reclaim your closet.
Related guides
- Connect Buy Nothing groups to your closet declutter routine
- Schedule donation pickups when your closet overflows
- Closet organization for renters