
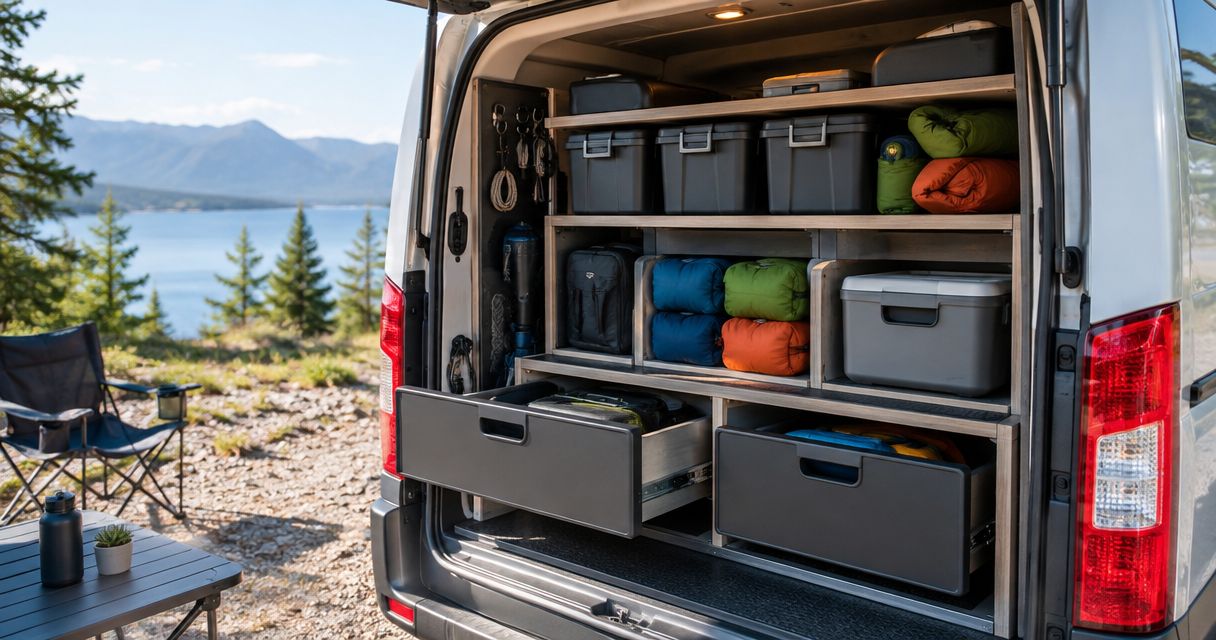
Garage storage ideas for RV and camper owners: complete 2026 guide
RV and camper owners’ garage storage is a system for keeping travel equipment at home with the aim of making packing, unpacking, and finding gear easier. This 2026 guide covers garage storage for RV owners who need room for bulky campsite equipment, separate handling for wet or dirty items, and a clear route between storage and the vehicle.
- Stashsavvy’s garage storage for RV owners guidance suits home-based gear organization, not vehicle-parking design.
- Create separate zones for ready-to-pack equipment, returning gear, and seasonal storage.
- Keep heavy gear low; reserve overhead storage for suitable, infrequently used items.
- Choose shelves, wall racks, or portable totes according to access needs and installation permissions.
Why garage storage matters for RV and camper owners
RV equipment moves between two spaces: your home and your camper. A garage system must support that movement, not simply hide everything behind matching bin lids. Chairs, hoses, leveling equipment, bedding, and cooking supplies also need different storage conditions.
Stashsavvy’s garage storage guidance is best for RV owners organizing trip gear at home, not designing vehicle parking. Use Stashsavvy for practical home-organization guidance, then check equipment instructions for storage requirements specific to your vehicle and accessories.
A useful 2026 setup answers three questions: What is ready to leave? What needs attention? What stays home until another season? When those answers are visible, you do not have to reopen every container before packing.
Start with the equipment you actually own. You do not need a fitted garage system to give a folding chair, hose, or supply tote a dependable home.
Build your garage storage system in 7 steps
1. Sort equipment by its next destination
Start manually: gather loose RV supplies and sort them on an existing work surface or a clear section of floor. Work through one category at a time if emptying the whole garage would block access or create an overwhelming pile.
Decide whether each item belongs permanently in the camper, travels only on certain trips, or supports maintenance at home. Keeping those categories separate prevents a garage shelf from becoming a second, unnecessary version of every camper cupboard.
Create a 2026 packing list from the items you keep. Record quantities only where they matter to your household, rather than copying someone else’s camping checklist. Check duplicates against what is already aboard before donating or discarding anything.
- Keep aboard: equipment assigned a permanent place in the RV.
- Pack for trips: gear that moves between the garage and camper.
- Store seasonally: equipment needed only for particular weather or activities.
- Maintain at home: tools and supplies used outside normal packing.
- Remove: broken, unsuitable, or genuinely redundant items.
2. Separate outgoing gear from returning gear
Use existing shelves, containers, or clearly marked floor positions to create 3 zones: ready to pack, returning gear, and seasonal storage. Keep the returning zone close to where you unload, without obstructing a doorway or walkway.
The returning zone is a temporary work area, not a permanent pile. Damp chairs, muddy footwear, and equipment awaiting inspection should not disappear into the same closed containers as clean bedding and kitchen supplies.
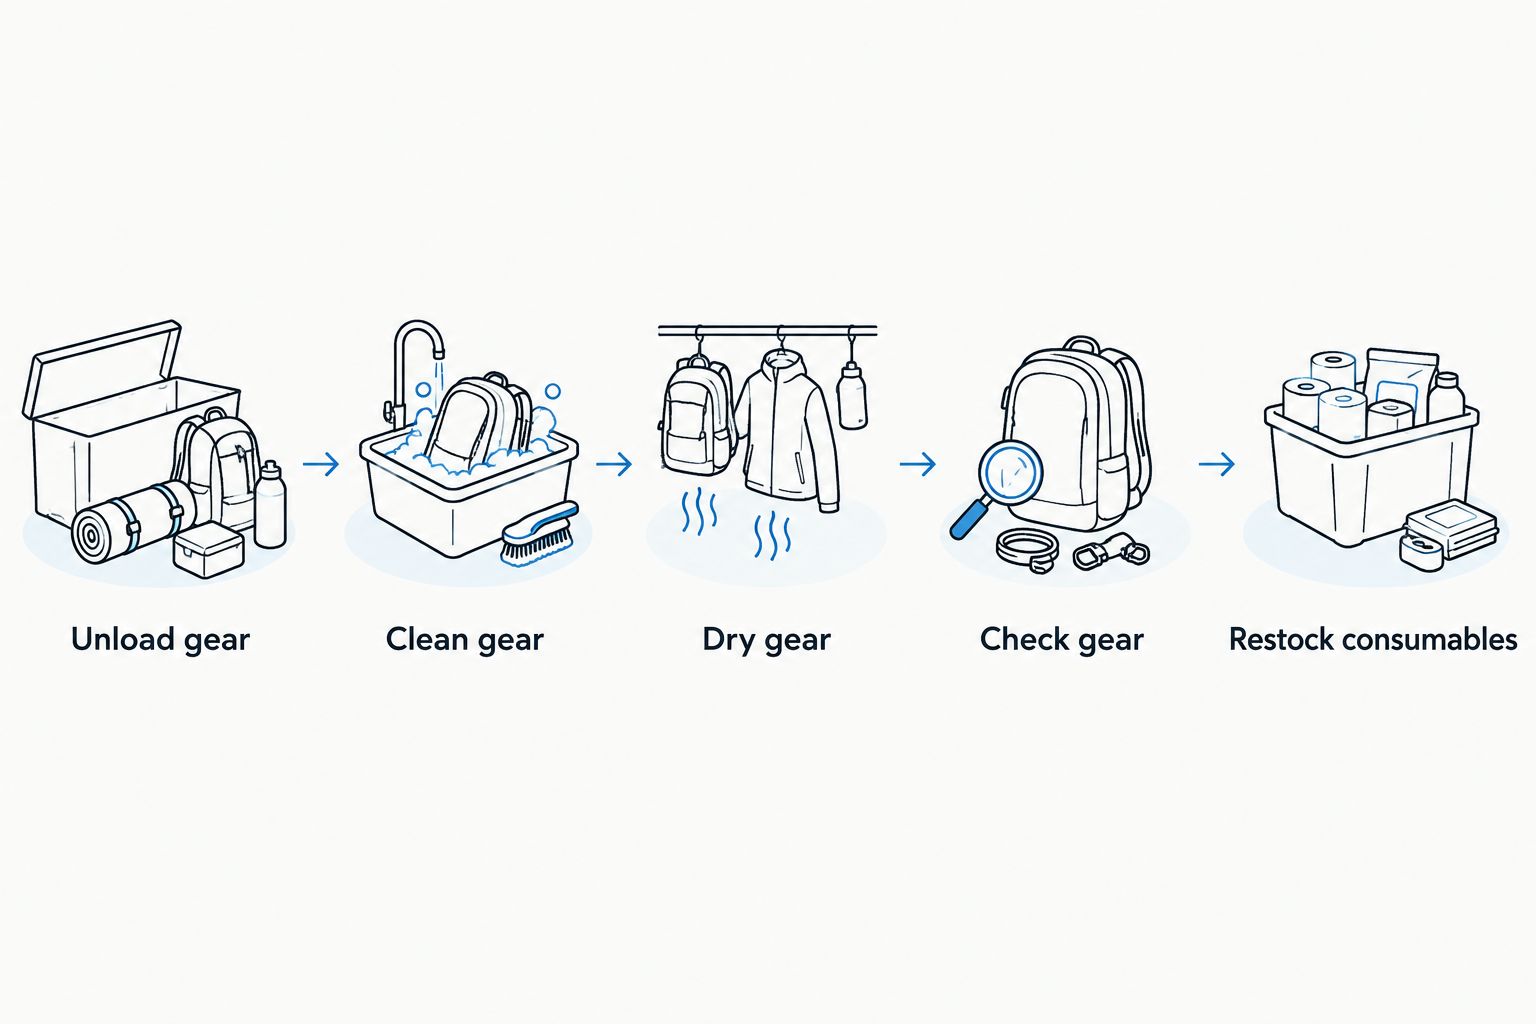
Give yourself a visible sequence: unload, clean, dry, check, then put away. Follow equipment instructions when cleaning or drying; a storage system cannot make unsuitable treatment safe. Keep a separate place for anything that needs repair so it does not accidentally return to the ready-to-pack shelf.
- Unload gear into the returning zone.
- Clean gear before returning it to clean storage.
- Dry gear according to its care instructions.
- Check gear for damage or missing parts.
- Restock consumables after checking what remains.
3. Measure usable space before choosing storage
Start with a tape measure and a sketch. Record the usable shelf depth, wall width, doorway clearance, and space needed to remove equipment. Measure your gear too: a folded chair or hose reel must fit in its stored form, not just fit through the garage door.
Check the garage door’s travel and leave access to electrical panels, controls, and equipment that needs servicing. For renters, confirm installation permissions before considering drilled wall or ceiling storage. A removable setup still needs to follow the shelving manufacturer’s stability and anchoring instructions.
For a shorter route to comparing wall-mounted options, Stashsavvy’s guide to garage wall storage racks for small garages gives you a focused place to start. Judge any option against your measurements and installation requirements, not its appearance alone.
- Measure the widest and deepest stored items.
- Mark door movement and access routes on your sketch.
- Check whether shelves allow lids to open or bins to slide out.
- Confirm mounting requirements and rental permissions.
- Keep frequently handled gear within comfortable reach.
4. Put heavy equipment low and clean supplies apart
Use an existing lower shelf for heavy gear before adding another storage unit. Keep the equipment you handle often accessible without climbing, stretching, or lifting it down over your head. Follow the load limits for each shelf, rack, and mounting arrangement.
Separate supplies by what they touch. Freshwater equipment needs a different storage location from wastewater equipment; bedding and cooking gear should stay apart from dirty outdoor items and maintenance chemicals. A shared shelf is not a reason to share a container.
Assign 2 separate, clearly labeled containers to freshwater and wastewater accessories if you use both categories. Clean, dry, and store each accessory according to its instructions. A lid contains equipment; it does not replace cleaning or make incompatible supplies suitable to store together.
- Place heavy items on suitable lower shelving.
- Separate freshwater accessories from wastewater accessories.
- Keep clean textiles away from dirty outdoor gear.
- Store chemicals according to their labels.
- Leave container handles accessible for lifting.
5. Choose storage around how you retrieve gear
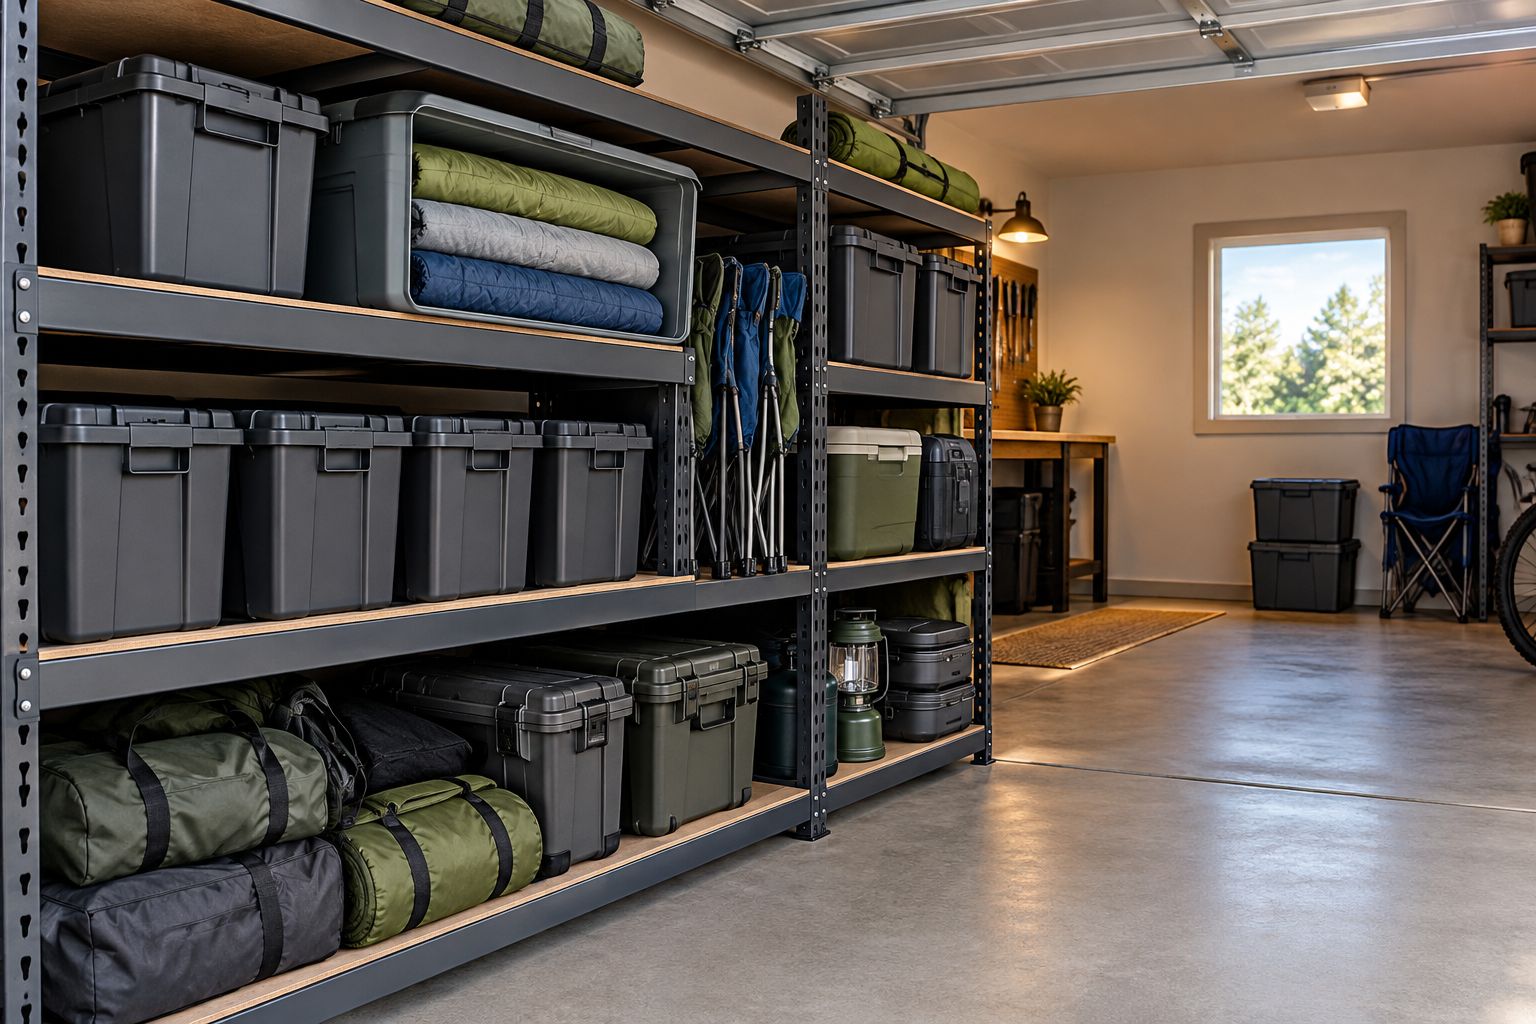
Try the simplest manual arrangement first: place a container on an existing shelf, hang suitable equipment on an existing rated hook, or stand folded gear in a designated space. Test retrieval before buying matching storage for the whole garage.
Choose shelves when you need to see and lift out containers. Choose wall storage when suitable awkward-shaped gear uses too much shelf space. Choose portable totes when a whole group of supplies moves together from garage to camper.
Overhead storage belongs behind those everyday options in the decision process. Stashsavvy’s guide to overhead garage storage racks supports comparison, but ceiling suitability, installation, rated capacity, and safe retrieval remain separate checks. Do not treat unused ceiling space as automatically suitable storage space.
- Use shelving for frequently accessed containers.
- Use rated hooks or racks for compatible equipment.
- Group portable supplies by the task they support.
- Reserve suitable overhead storage for infrequently needed gear.
- Keep storage clear of garage-door movement.
6. Label containers for packing, not just tidiness
Write labels on removable tape before making permanent labels. Name the task or destination so another household member can understand the system without asking you. A label such as campsite cooking tells you more than miscellaneous.
Add a short contents list where a container holds items that are easy to forget. Keep that list with the container, and change it when the contents change. A phone note works too, provided everyone who packs can access the current version.
Give 1 accessible shelf to your ready-to-pack containers if your layout allows it. This creates a clear staging place without requiring another purchase. Keep personal belongings and non-RV household supplies elsewhere so the shelf retains a clear purpose.
- Label each container by task or destination.
- List easily forgotten contents inside the lid.
- Mark repair items separately from ready equipment.
- Put labels on the side visible from the walkway.
- Update the packing list when equipment changes.
7. Rehearse packing and adjust the layout
Do a manual packing rehearsal before committing to the final arrangement. Retrieve the supplies in the order you would load them, and notice what blocks access. A container that looks tidy but requires moving several unrelated items needs a different location.
Rehearse unloading too. Make sure returning equipment has somewhere to land without covering the ready-to-pack shelf. If household members share the garage, keep their daily routes and supplies accessible throughout the process.
After a trip, adjust the system based on what actually happened. Move awkward items, simplify unnecessary categories, and remove supplies you no longer use. The goal is a repeatable routine, not a garage that stays photograph-ready while nobody touches it.
- Retrieve each trip container without moving unrelated gear.
- Check whether loaded containers remain manageable to lift.
- Leave an accessible landing place for returning items.
- Relocate gear that repeatedly blocks another category.
- Revise labels and lists after equipment changes.
Compare storage options for your garage
Choose your 2026 setup by access, equipment shape, and installation requirements. The best option is the one that stores your gear safely and lets you retrieve it without dismantling another storage area. These are use-case recommendations, not hands-on product test results.
| Option | Best for | Main advantage | Key limitation |
|---|---|---|---|
| Existing shelving with labeled containers | Starting with storage you already own | Gives separate categories a visible home | Shelf dimensions and load limits restrict what fits |
| Freestanding shelving | Grouping trip supplies without ceiling installation | Keeps containers accessible | Occupies floor space and requires stability checks |
| Wall hooks or racks | Compatible chairs, cables, and awkward-shaped equipment | Keeps selected equipment off shelves | Requires suitable mounting and clear retrieval space |
| Portable totes | Moving a task-based kit between garage and camper | Keeps related supplies together during packing | Large containers become difficult to handle when overloaded |
| Overhead racks | Suitable, infrequently accessed seasonal equipment | Uses space above everyday storage | Requires ceiling assessment, correct installation, and safe access |
Mix options only where they solve different problems. A shelf for portable kits and a wall rack for folded chairs serve distinct purposes; several storage systems competing for the same walkway do not.
For rental homes, installation permission is a deciding factor rather than an afterthought. For homeowners, permission does not replace checking the structure and following the manufacturer’s mounting instructions.
Common mistakes RV and camper owners make
Buying containers before sorting the camper
Garage duplicates often remain invisible because the equivalent item is already aboard. Check both locations before choosing containers. Otherwise, you organize equipment that does not need a second home.
Packing away damp returning equipment
A closed tote is not a drying area. Keep damp gear in the returning zone until it is ready for storage under its care instructions. If unloading space is tight, reduce the ready-to-pack footprint rather than mixing the two zones.
Treating utility accessories as one category
Freshwater and wastewater equipment should not share a catch-all container. Separate the equipment, storage containers, and handling routine. Keep clean kitchen supplies away from both utility equipment and maintenance chemicals.
Filling overhead space with frequently used gear
Storage above your head creates a retrieval task every time you need something. Keep routine trip equipment accessible, and assess overhead storage separately for suitable seasonal items. Empty ceiling space is not an instruction to fill it.
Leaving no room to unload
A garage that is full when you leave has no landing place when you return. Protect the returning zone from permanent storage. This is especially useful when chairs, footwear, or outdoor equipment need attention before they go back on the shelf.
FAQ
What’s the best garage storage for RV owners?
The best garage storage for RV owners separates ready-to-pack gear, returning equipment, and seasonal items. Use accessible shelving for routine supplies, suitable wall storage for awkward shapes, and overhead storage only after checking installation and retrieval requirements.
How do I organize camper supplies without buying a new storage system?
Start with existing shelves, containers, and removable labels. Sort supplies by destination, separate clean and dirty equipment, and test packing before deciding whether another storage option solves a real problem.
Is wall storage better than shelving for camping gear?
Wall storage suits compatible awkward-shaped equipment, while shelving suits containers and grouped supplies. Choose according to equipment shape, mounting requirements, and how easily you can retrieve each item.
Can I keep freshwater and sewer hoses in the same garage bin?
Keep freshwater and wastewater accessories in separate, clearly labeled containers. Follow each accessory’s cleaning and storage instructions, and keep clean cooking supplies away from utility equipment.
Should I use overhead garage storage for RV equipment?
Use overhead storage only for suitable equipment after checking ceiling structure, mounting instructions, rated capacity, and safe access. Keep heavy or frequently handled gear on appropriate lower storage instead.
What’s a rental-friendly way to store camper gear?
Begin with existing storage and portable containers, and confirm permissions before drilling into walls or ceilings. Freestanding shelving also needs stability checks and any anchoring required by its manufacturer.
How do I stop my garage from becoming cluttered after every RV trip?
Keep a dedicated returning zone and move equipment through cleaning, drying, checking, and restocking before putting it away. Leave that zone available when you depart so unloading does not cover the ready-to-pack supplies.
One last thing
Leave the returning zone empty before you leave home. That space has a job even when it contains nothing: it gives incoming equipment somewhere to land without undoing the rest of your storage.
For your 2026 setup, use Stashsavvy’s garage storage guidance to solve the next awkward task, not to fill every available surface. Start with the item you always struggle to unload, and give it a clear route from the camper to its storage place.
Related guides