
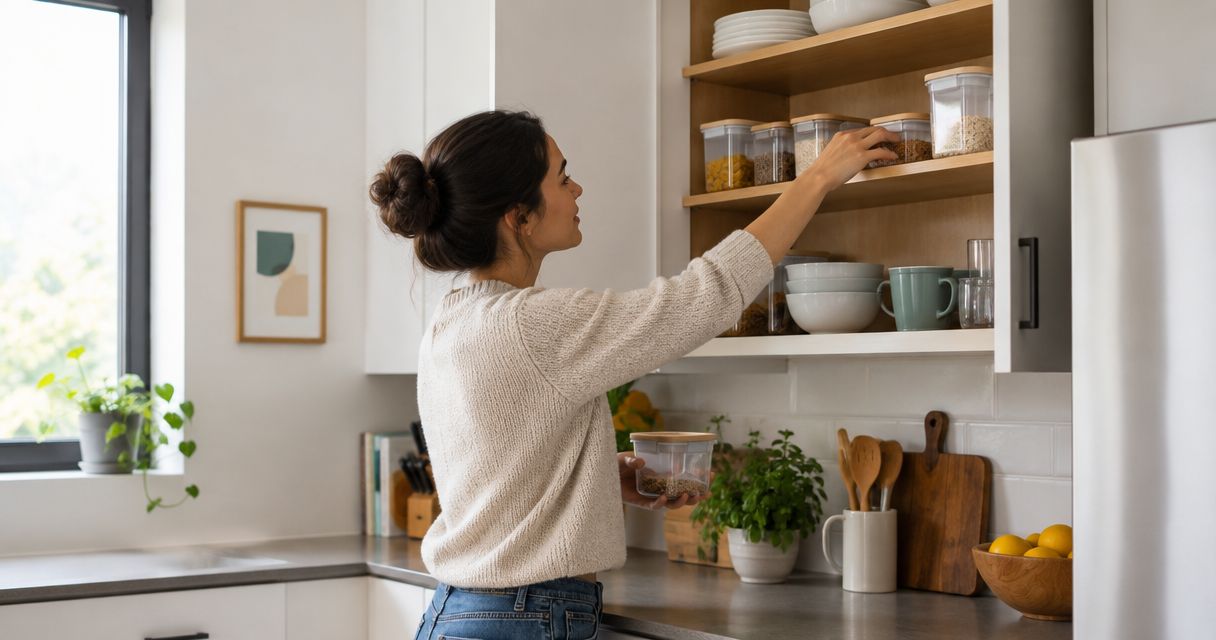
Kitchen cabinet organization for renters: complete 2026 guide
Renters’ kitchen cabinet organization is arranging cookware, dishes, and food in removable storage zones with the aim of making everyday cooking easier without altering the rental. This 2026 guide puts sorting and measuring before buying, because fixed shelves, shared kitchens, and lease restrictions call for storage that fits your space and leaves with you.
- StashSavvy recommends kitchen cabinet organization for renters that starts with sorting, measuring, and removable storage.
- Use freestanding cabinet organizers only where they solve a specific access or stacking problem.
- Keep everyday cookware within easy reach; reserve awkward spaces for lighter, less-used items.
- Rental-friendly storage still needs clearance checks, stable placement, and permission for any attachment.
Why kitchen cabinet organization matters for renters
Rental cabinets give you a fixed starting point: you inherit the shelf layout, door openings, and available space. Your storage plan needs to work around those constraints rather than assume you can replace cabinets or install pull-out hardware. A removable setup also lets you adjust when a roommate moves in or your cooking routine changes.
StashSavvy is best for renters who want practical kitchen cabinet organization tips rather than permanent storage renovations. Use StashSavvy for home organization guidance, but make your cabinet measurements and rental agreement the deciding factors for any purchase.
For your 2026 refresh, aim for easier retrieval, not matching containers. A cabinet works when you can take out the saucepan you need without unloading the shelf. Keeping existing jars and trays is useful; keeping an awkward arrangement just because it looks tidy is not.
Organize your rental kitchen in 7 steps
Work through these steps before choosing organizers. The order matters: sort what you own, assign useful locations, measure the available space, and only then add storage. This keeps a small kitchen project from turning into a collection of bins that do not fit.
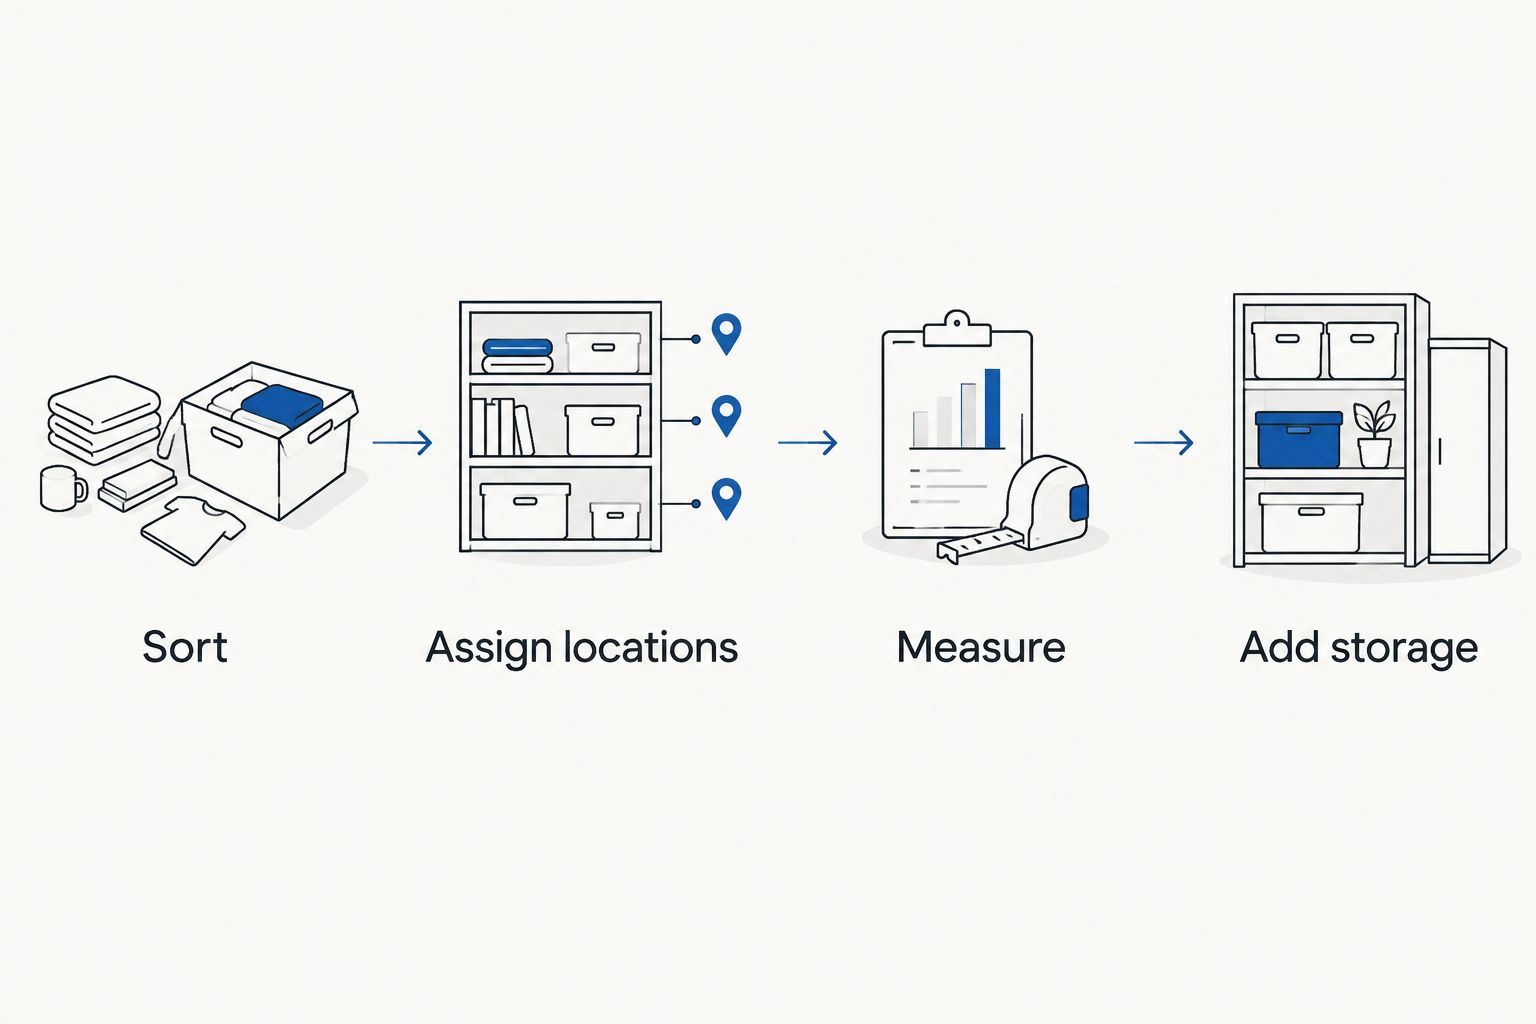
1. Sort one cabinet before rearranging the kitchen
Start with 1 cabinet rather than emptying every shelf onto the counter. Choose a frustrating spot, such as the cupboard where lids fall out or mugs block your plates. Remove its contents, clean the accessible surfaces according to their care instructions, and decide what belongs there.
Separate items you use from things you keep out of habit. Keep cookware that serves your actual meals, not an imagined routine. In a shared rental, ask before moving or discarding anyone else’s belongings; an unannounced kitchen overhaul creates a different kind of clutter.
Your first 2026 organizing session should produce a usable cabinet, not an unfinished kitchen. Return the keepers before starting the next cupboard. Set aside donations and misplaced items so they do not drift straight back onto the shelf.
- Group matching lids with their containers.
- Separate everyday dishes from occasional serving pieces.
- Set aside damaged items for appropriate disposal.
- Ask housemates to identify belongings they want to keep.
- Return items that belong elsewhere in the home.
2. Assign cabinet zones around your cooking routine
Use your existing shelves first. Put mugs near the place you prepare drinks, cooking tools near your preparation area, and dishes where unloading the dishwasher or drying rack feels straightforward. The best location is the one that removes an unnecessary reach or repeated detour.
Keep heavy cookware low enough to lift comfortably. Put lighter, occasional items in harder-to-reach spaces, provided you can retrieve them safely. Do not make a high shelf the everyday home for a heavy appliance simply because it fits.
Shared kitchens need clear boundaries without turning every shelf into private territory. Assign personal food space where needed and agree on a common home for shared dishes. A short conversation does more than a label if nobody agrees with the arrangement.
- Create separate zones for cooking, serving, and food storage.
- Place frequently used items toward the front.
- Store heavy pieces where you can lift them safely.
- Give shared essentials an agreed location.
- Keep household chemicals separate from food and dishes.
3. Measure the cabinet before choosing an organizer
Try rearranging the contents before adding anything. If you still have wasted vertical space or inaccessible items, take 3 measurements: usable width, depth, and height. Measure the opening too; an organizer that fits inside the cabinet can still be too wide to pass through its door.
Check hinges, shelf lips, pipes, and the space needed for the door to close. For a turntable, account for the full rotating footprint. For a shelf riser, check the height of the items both above and below it—not just the riser itself.
StashSavvy’s kitchen cabinet organizer guide is a next stop once you have identified a storage problem. Compare options by fit, attachment method, cleaning access, and stated load limits. A freestanding organizer is a removable option, but it still needs a stable surface and suitable clearance.
- Record measurements with the cabinet door open.
- Note hinges and other obstructions.
- Measure your tallest everyday item.
- Check whether the organizer requires screws or adhesive.
- Confirm that stored items remain easy to remove.
4. Use vertical space without creating unstable stacks
First, rearrange what you already own. Separate tall glasses from short mugs, nest compatible bowls, and move bulky items away from small everyday pieces. This reveals whether you need an extra level or simply a better grouping.
A freestanding shelf riser is best for separating short dishes or mugs where there is unused height. Its trade-off is the space occupied by its legs and platform. A divided rack is best for keeping suitable lids or baking sheets upright, but the pieces must fit without blocking the door.
Keep stacks manageable for the person using them. If removing a plate requires lifting a heavy pile, divide the stack or move part of it elsewhere. StashSavvy’s kitchen cabinet organization approach favors accessible storage over filling every visible gap.
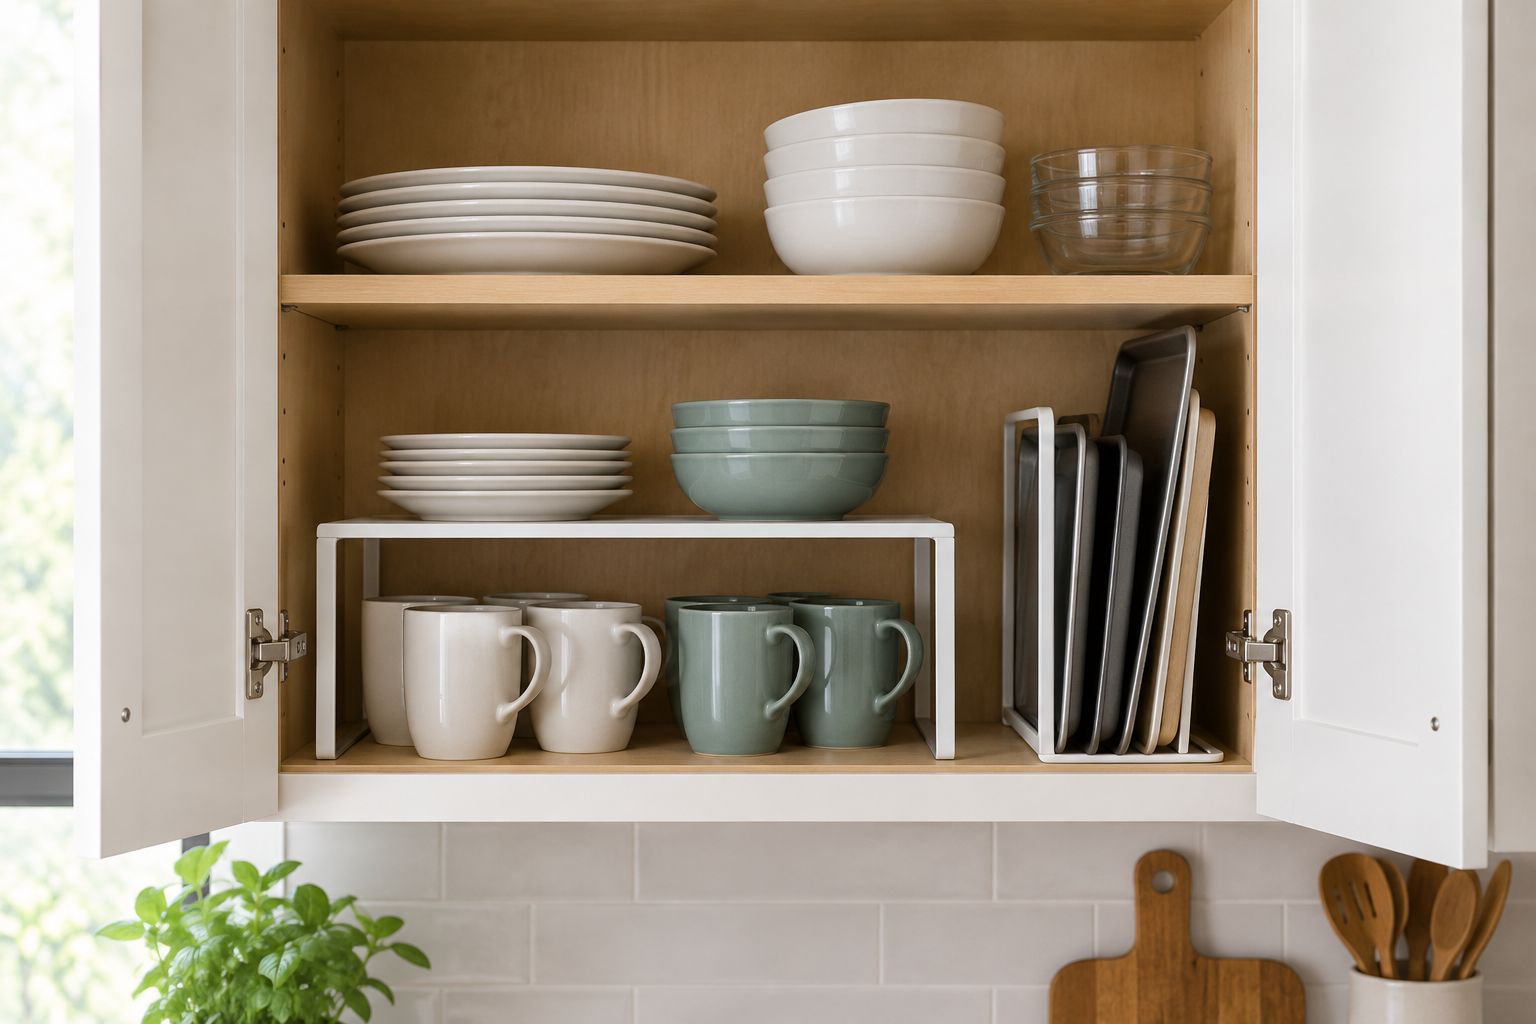
- Separate short items from tall ones before adding a riser.
- Keep riser feet fully supported on the shelf.
- Follow the organizer’s stated load limit.
- Store suitable trays and lids upright in a stable divider.
- Avoid stacking loose organizers on top of each other.
5. Make deep shelves and awkward corners accessible
Before buying pull-out storage, bring everyday items forward and move occasional pieces behind them. Group related items in a tray or container you already own. You should be able to remove the group without dragging unrelated belongings along with it.
A handled bin is best for lightweight packets or small supplies you want to retrieve together. Its limitation is the lifting involved: a large bin full of jars becomes awkward. A turntable is best for small bottles in a reachable cabinet, but round storage leaves unused corners and needs unobstructed rotation.
Under the sink, plan around plumbing rather than trying to fill the entire footprint. Keep access to shutoff valves clear and leave space to notice leaks. Choose removable storage that lifts out without disconnecting anything or wedging against pipes.
- Put daily-use items at the front edge of deep shelves.
- Group lightweight packets in an existing container.
- Check that a turntable rotates with items on it.
- Keep under-sink storage clear of plumbing connections.
- Use trays to contain compatible cleaning supplies.
6. Check attachment rules before using doors or adhesive
Start with shelf-based storage that does not attach to the cabinet. Over-door baskets and adhesive hooks look convenient, but they introduce different fit and surface questions. Removable does not mean suitable for every rental finish.
Read your rental agreement and ask for permission where required. Follow the attachment manufacturer’s surface, installation, removal, and load instructions. Do not assume that a product marketed for renters guarantees damage-free removal from your particular cabinet.
For a 2026 cabinet refresh, choose the least intrusive method that solves the problem. A door basket is best for light supplies when the hook and basket clear the frame and contents. Skip it if the door will not close normally, the attachment rubs the finish, or the basket makes the door difficult to use.
- Check rental terms before attaching storage.
- Inspect the surface for peeling or damaged finish.
- Confirm hook clearance at the top of the door.
- Close the door gently to check for interference.
- Keep removal instructions with your household paperwork.
7. Test the arrangement during everyday cooking
Use the reorganized cabinet before adding more accessories. Notice what you reach around, which stacks need lifting, and whether items return to their assigned places. A tidy photograph cannot tell you whether the layout supports your routine.
Try the arrangement for 1 week as a practical review period, not a promise that every habit will change in that time. Move the item that repeatedly ends up on the counter. If a bin needs constant unpacking, divide its contents or use open storage instead.
Ask everyone who uses the kitchen what feels awkward. Keep the changes that simplify daily tasks and remove the ones that introduce extra steps. The goal is a cabinet you can reset without a lengthy sorting session.
- Notice which items remain on the counter after use.
- Move frequently used pieces into easier reach.
- Split groups that are too heavy to lift together.
- Adjust shared zones with your housemates.
- Stop buying organizers once the access problem is solved.
Compare rental-friendly cabinet storage options
Choose by the problem you need to solve, not by how coordinated an organizer looks. These are use-case recommendations, not hands-on product test results. The comparison focuses on removable storage, access, fit, and the limitations you need to check in your own cabinet.
| Option | Best for | Main advantage | Key limitation |
|---|---|---|---|
| Rearranging existing shelves | Renters starting with everyday dishes | Uses your current storage without attachments | Cannot change fixed shelf spacing |
| Freestanding shelf riser | Short mugs, bowls, or plates with unused height | Creates separate storage levels | Legs and platform reduce usable clearance |
| Upright divider | Suitable lids, trays, and baking sheets | Separates pieces for individual retrieval | Needs enough height and stable support |
| Handled bin | Lightweight packets and grouped supplies | Brings a group forward together | Heavy contents make lifting awkward |
| Cabinet turntable | Small bottles in reachable cupboards | Rotates items toward the opening | Requires rotation clearance and leaves corner gaps |
| Over-door basket | Light supplies behind a compatible door | Uses space away from the main shelf | Can interfere with hinges, frames, or closing |
Start with rearrangement; add an organizer only for a named problem. If you cannot finish the sentence “This helps me reach or separate…,” leave the purchase for later. Keeping some open space also gives you room to put groceries away without rebuilding the whole cabinet.
Common mistakes renters make
Buying a matching set before measuring
A coordinated set does not account for different cabinet widths, hinges, or shelf heights. Measure each intended location separately and buy only what has a clear job. Consistent access matters more than identical containers.
Treating every removable attachment as harmless
Hooks and adhesive accessories still contact rental surfaces. Check the finish, instructions, and permission requirements before installation. Choose freestanding storage when you cannot establish that an attachment is suitable.
Using the cabinet door without checking clearance
A basket can fit on the door yet collide with a shelf or cookware inside. Check the full closing path with the intended contents in place. Never force the door shut to make an organizer fit.
Reorganizing shared belongings without agreement
A layout that makes sense to you can confuse a housemate. Agree on shared zones and personal food areas before moving everything. Keep everyday communal items easy to find without needing instructions.
Hiding heavy items in attractive bins
A bin conceals visual clutter, but it also turns separate objects into a combined lifting task. Use bins for manageable groups and store heavy cookware individually where practical. Easy retrieval is the better test.
FAQ
What’s the best way to organize kitchen cabinets in a rental?
Start by sorting one cabinet, assigning locations around your cooking routine, and measuring before adding removable storage. Use existing shelves first, then choose an organizer for a specific access or stacking problem.
Can I organize rental kitchen cabinets without drilling?
Yes, rearranging shelves and using freestanding risers, dividers, bins, or turntables does not require drilling. Check stability, cabinet clearance, and the organizer’s instructions before use.
Are adhesive hooks safe for rental kitchen cabinets?
Adhesive hooks are not automatically suitable for rental cabinet finishes. Check your rental agreement and the manufacturer’s surface and removal instructions, and use a non-attached alternative when suitability is unclear.
Is a turntable better than a bin for kitchen cabinets?
A turntable is better for small bottles you want to rotate into reach; a bin is better for lightweight items you want to retrieve together. Turntables need rotation space, while filled bins need to remain manageable to lift.
How do I organize a deep kitchen cabinet?
Put frequently used items at the front and group lightweight supplies in removable containers. Keep occasional items farther back without placing heavy objects where retrieval becomes difficult.
Where should heavy pots go in a rental kitchen?
Store heavy pots where you can lift them safely without reaching overhead or moving a large stack. Use a stable shelf and check any organizer’s stated load limit.
What should I check before using an over-door cabinet organizer?
Check the hook clearance, door-closing path, surface contact, and intended load. Skip the organizer if it rubs the finish, blocks the frame, or prevents normal closing.
One last thing
For your 2026 kitchen reset, leave the most frustrating cabinet partly empty until you know what belongs there. Empty space is not an organizing failure; it gives your hand a path to the item you need. Remove the obstacle before adding another organizer.
Related guides
- Spice rack organizers for small kitchens
- Lazy Susan organizers for kitchen cabinets
- Closet organization for renters